Recipe: Italian Mimosa cake

Just in time for Women’s day – here is a classic recipe for the delicious Italian mimosa cake.
It is usually prepared for Women’s day on 8th of MarchDSC00686
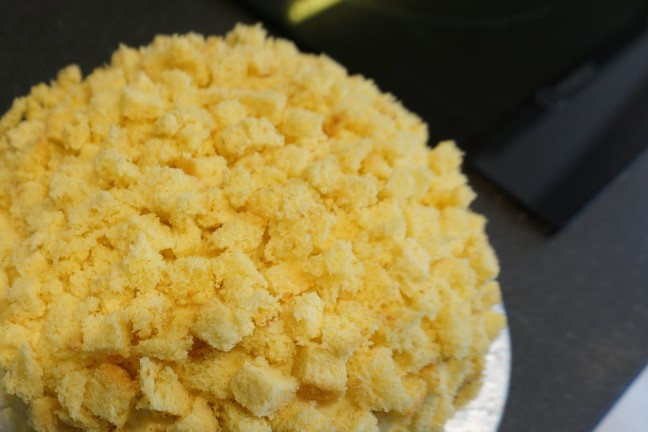
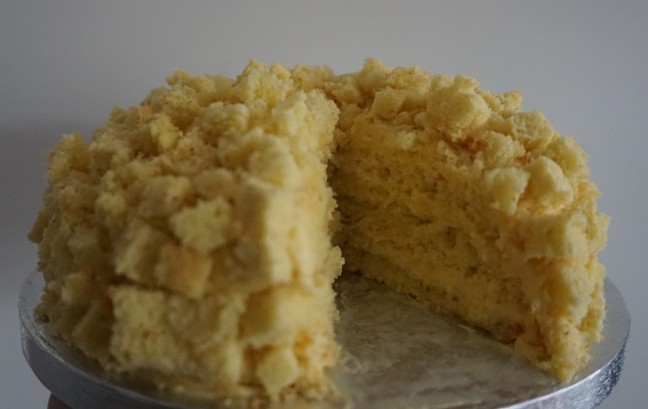
The name of the cake is due to its shape resembling the flowers of the mimonsa plant

129966558754916132358_DSC00515

Level of recipe difficulty: medium

Ingredients:
For the cake base:

  • 2 eggs
  • 4 egg yolks
  • 110 g sugar
  • 100 g flour
  • 20 g potato flour (fecola di patate – sold in Italian delis)

For the custard:

  • 150 ml milk
  • 150 ml double cream
  • 100 g sugar
  • 4 egg yolks
  • 27 g flour
  • 1 teaspoon vanilla flavour

For the dip:

  • 50 ml water
  • 1 table spoon orange blossom water
  • 25 g sugar

For the cream with sugar:

  • 100 ml double cream
  • 10 g icing sugar

Method:
First prepare the cake base:

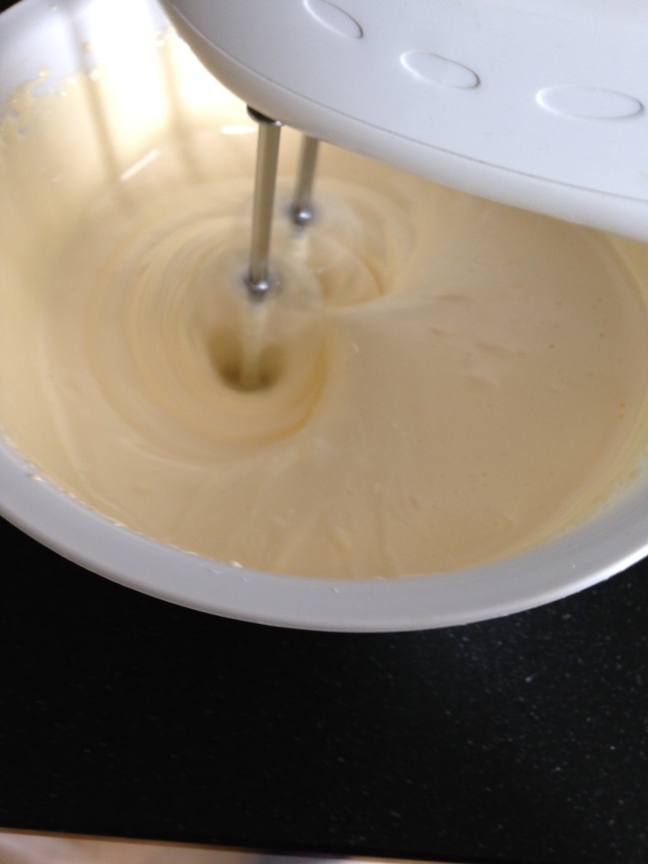
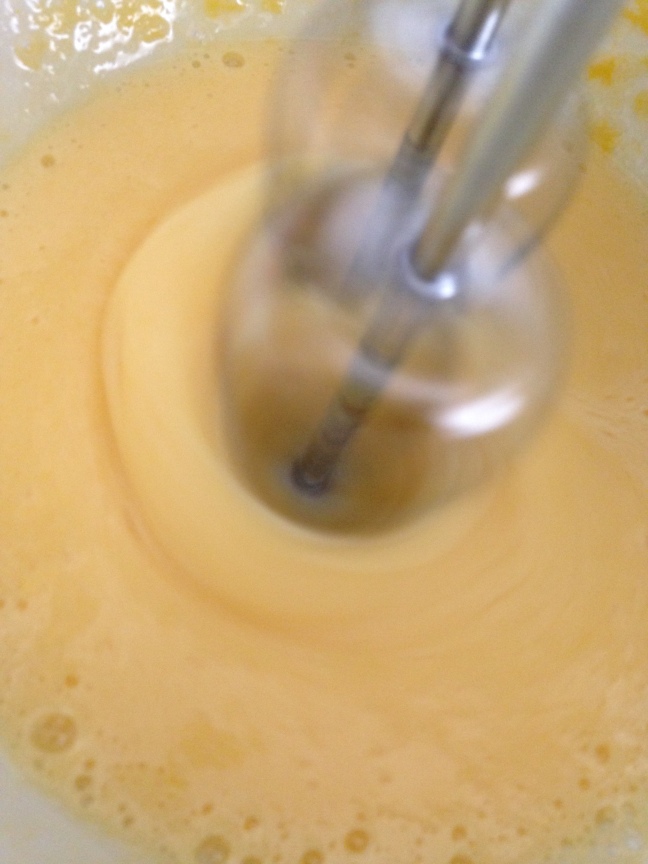
Mix the eggs and sugar in a bowl, using an electric whisk for 10 – 15 minutes at high speed. This is an important step to ensure the cake base is light and full of air bubbles.
Then add the egg yolks and continue mixing for another 6 minutes. 
IMG_2642IMG_2656Once the eggs have been incorporated, add the flour and potato flour through a sieve, folding the flour in delicately by hand to add even more air into the mix.
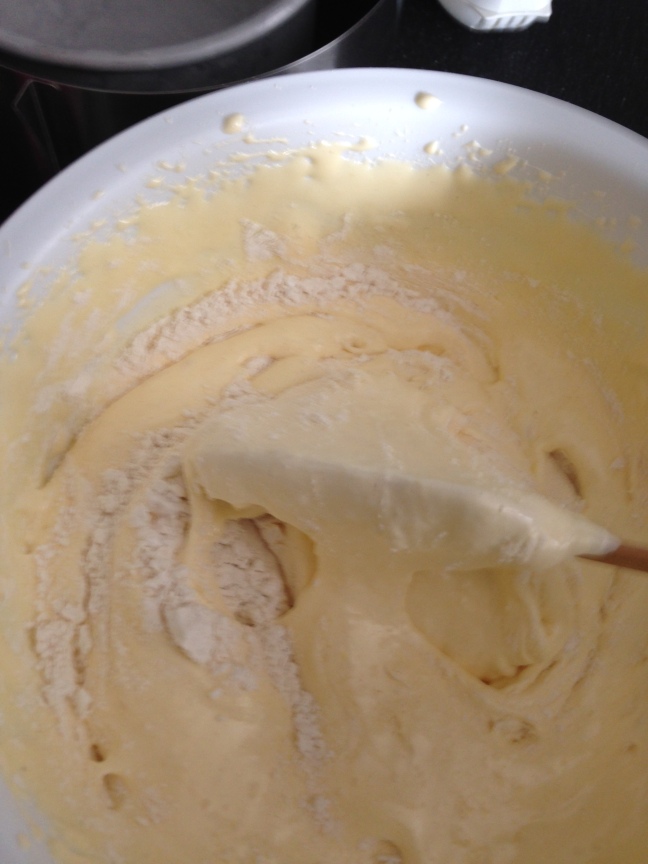
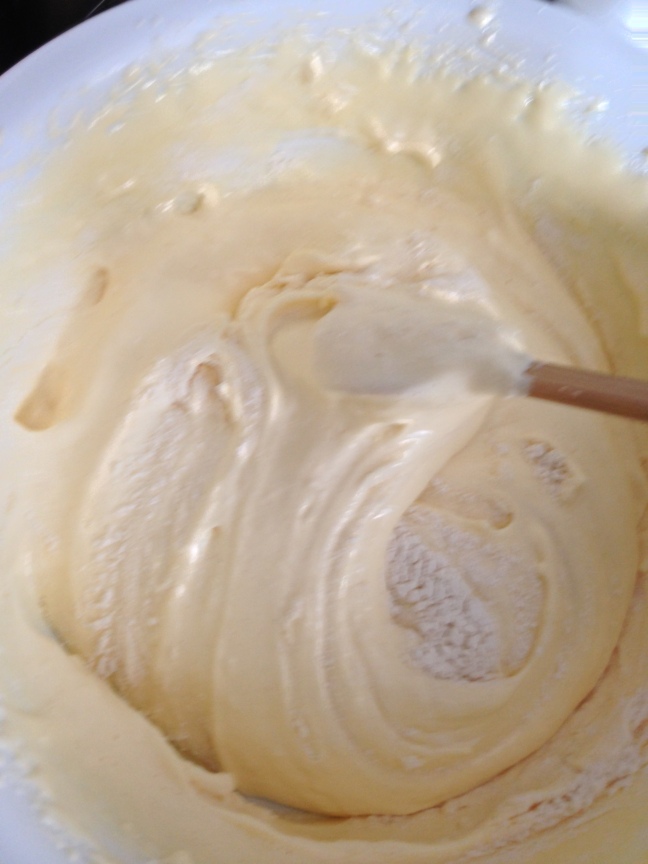
IMG_2664IMG_2667Butter and flour a round baking tin, add the cake mix and bake at 180°C for circa 30 minutes. IMG_2671
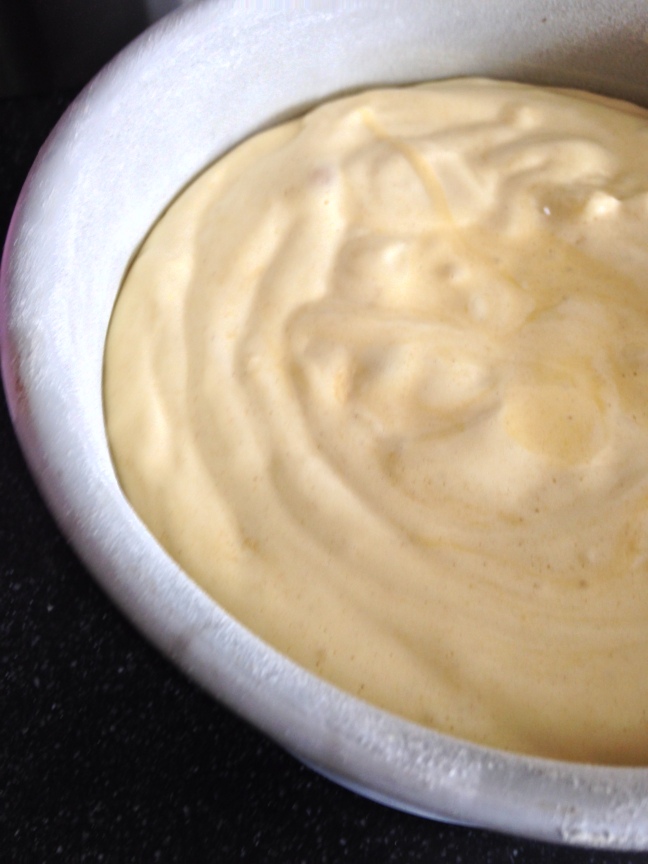
While the cake bakes, prepare the custard:
In a small pan mix the milk, double cream and vanilla flavour.
In another small pan mix the egg yolks and sugar.
Heat both pans up, stirring constantly, but do not boil.
Stir the egg and sugar mix with a wooden spoon. Then add the flour and stir it until smooth.
Now add the warm milk and cream into the egg-sugar-flour mix and stir at medium temperature until the custard starts to set.
Ensure the flour in the custard cooks. 
Once the custard starts to bubble, remove it from the heat and pour it into a flat pyrex ramekin.
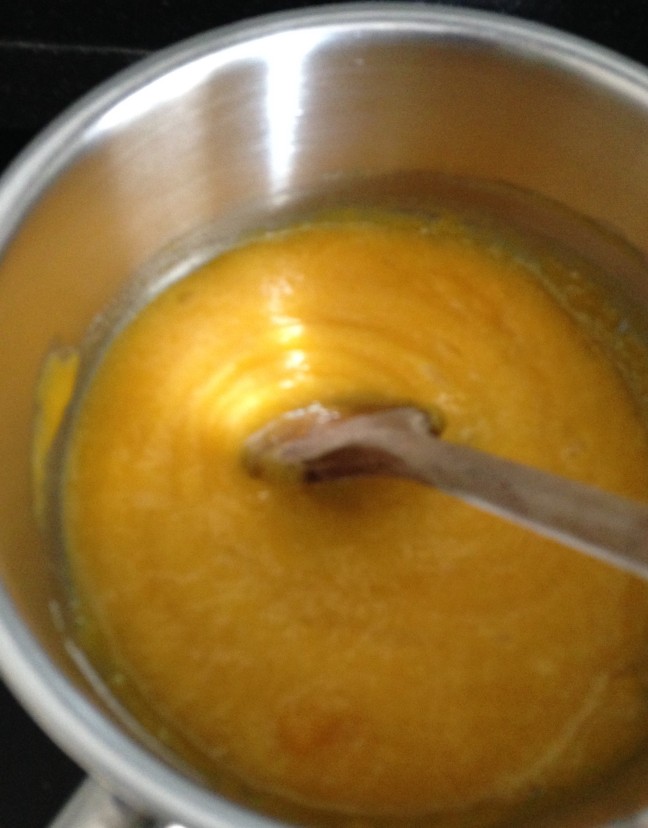

IMG_2674
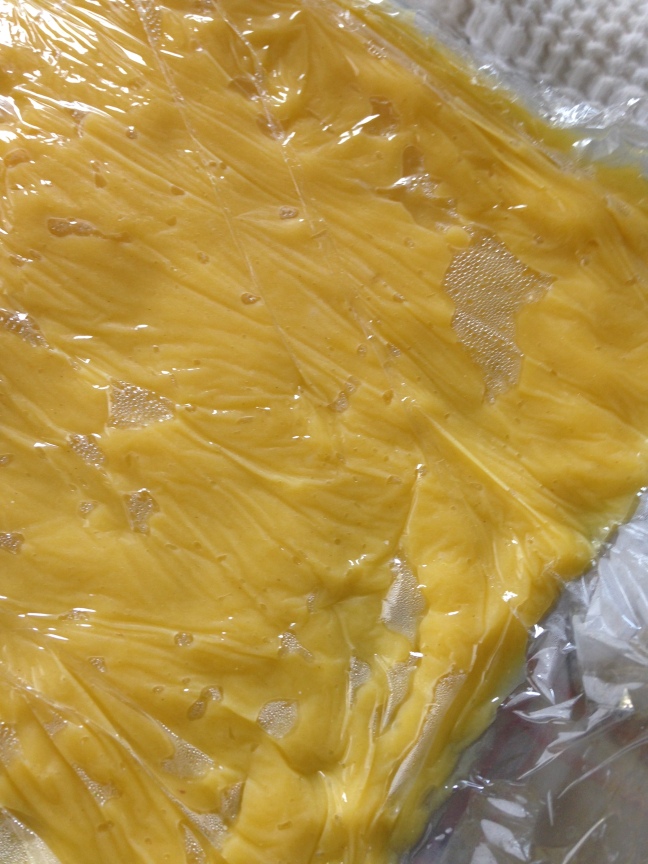
Cover the custard with cling film. The cling film needs to touch the custard. Then place it in the fridge to cool. IMG_2694
Prepare the dip:
In a small pan, mix the water, sugar and orange blossom water. Heat it up to let the sugar melt. Then put to one side to cool.

Assembling the cake: 
When the cake base is baked through and a skewer comes out clean, remove it from the oven and let it cool on a flat surface , turning the cake base upside down.


Once the cake base has cooled completely, cut off the brown crust all around the cake to reveal the yellow cake. Now cut it into half.
Then with a long-bladed knife, cut one of these cake halfs carefully into three even layers. These will form the layers of the cake.
Cut the other half of the cake base into small cubes. These will be used to decorate the top and sides of the cake.


Whip the cream and caster sugar. 
Keep two table spoons of cream to one side
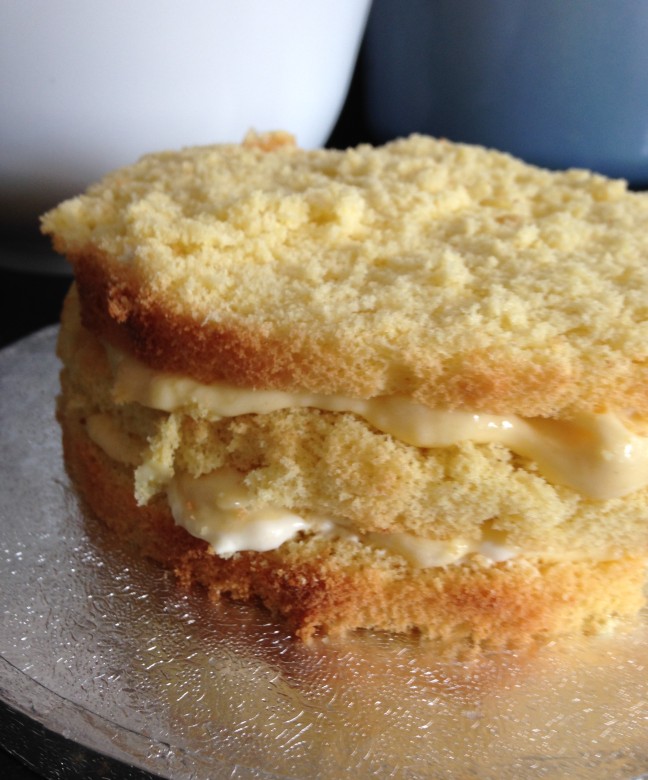
Place the first cake layer on a plate or cake stand.
With a table spoon drizzle a third of the dip onto the layer. Then spread some cream on top and then some custard.
Cover with another layer of cake. and repeat.
Then cover with the third cake layer.
IMG_2700

Once you have assembled the three cake layers with the dip, cream and custard, cover the entire cake with custard and do the same with the sides of the cake. 

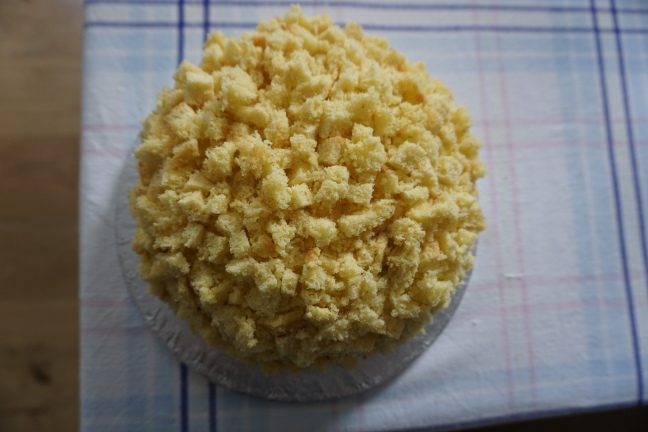
Then cover the top and sides of the cake with the yellow cake cubes you have cut. The custard will act as ‘glue’. 

Ensure the cake is covered with cubes from all sides, place in the fridge and voilà your mimosa cake is ready!
DSC00680

DSC00686

DSC00689

129966558754916132358_DSC00515

I hope you enjoyed. Happy Women’s day!

Recipe: New York Cheese Cake

(Recipe by Michel Roux)
Mmmmh, this cake is perfect for autumn, served with a cappuccino or coffee, accompanied by your favourite read.
Here’s how to prepare it:

New York Cheese Cake

IMG_0014

Ingredients: 

For the Base:

  • 33 g melted butter, plus 10 g to grease
  • 125 g digestive biscuits

For the Filling:

  • 500 g cream cheese, softened
  • 1 tbsp milk
  • 175 g caster sugar
  • 18 g plain flour
  • Very finely grated zest of 1/2 orange
  • Very finely grated zest of 1/2 lemon
  • 3 eggs
  • 1 egg yolk
  • 1/2 vanilla pot split lengthways

Method:
Preheat the oven to 180°C.

Butter a 22 cm cake tin and place it onto a baking sheet.
Using a pestle and mortar crush the biscuits into fine crumbs, then transfer them to a bowl and add the melted butter. Mix thoroughly.
Pour the biscuit mixture into the cake tin and spread it into a uniform layer, pressing it firmly and evenly.
Bake the base for 12 minutes until firm, then set aside to cool, still keeping the tin on the baking sheet.

Increase the oven setting to 220°C.
Use an electric mixer to beat the cream cheese, milk, sugar, flour and grated citrus zests into an even, smooth, light and creamy mixture.
On a low speed, incorporate the eggs one at a time, followed by the egg yolks.
Scrape the vanilla seeds from the pod into the mixture.
Scrape the sides of the bowl several times to ensure the filling is homogeneous.
Pour the filling over the biscuit base and bake for 12 minutes, then lower the oven setting to 100°C and cook for a further 1 hour until set but still slightly wobbly at the centre.
Turn the oven off, leaving the cheese cake inside the oven with the door slightly a jar for 1 hour to cool slowly.

Transfer the cake in its tin to a wire rack to cool completely, then refrigerate for at least 6 hours before serving.

Carefully cut the cake into slices using a very sharp knife dipped in hot water between each cut.

Bon Appétit! 

New York Cheese Cake


Italian Recipe – Sicilian almond paste / pasta reale biscuits

Sicilian pasta reale biscuits

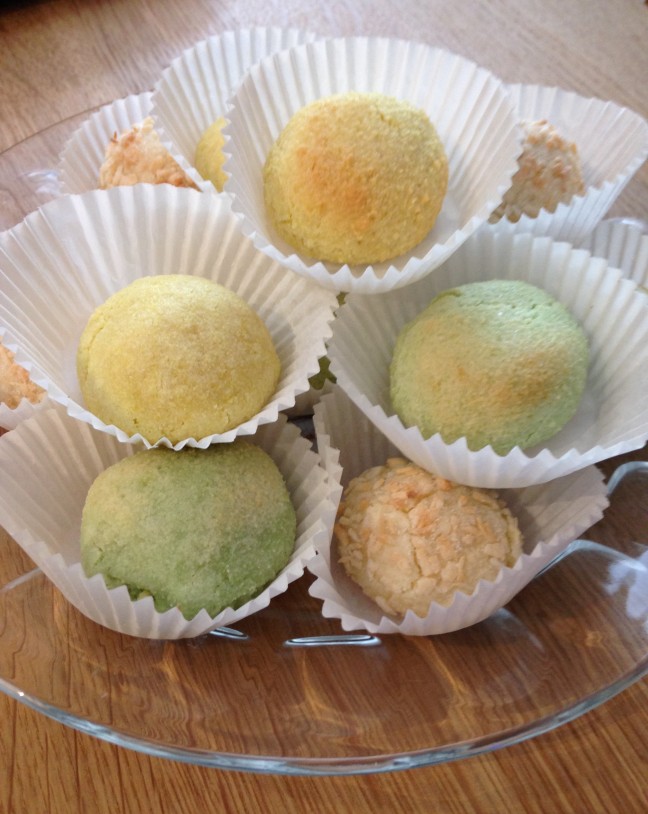
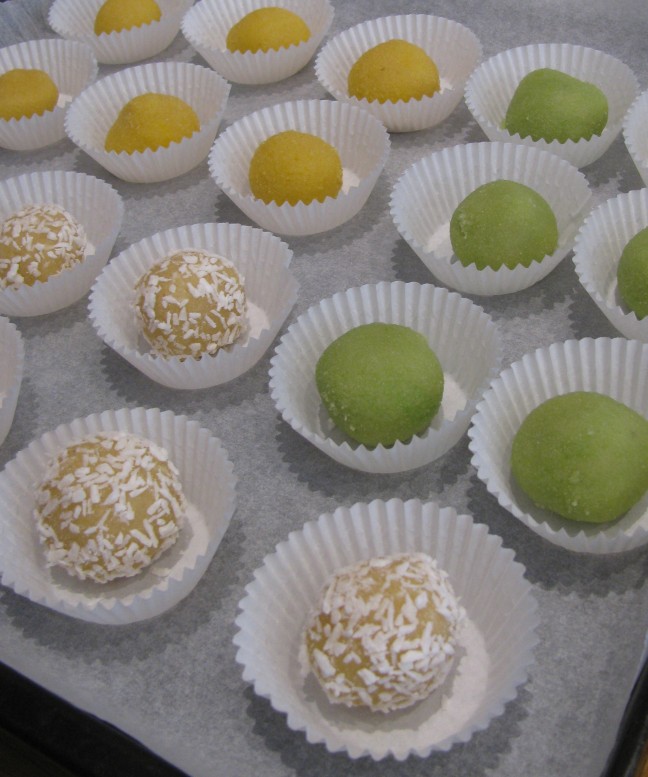
These delicious almond paste biscuits follow an original Sicilian recipe. Note, they are very sweet, however taste heavenly and can be baked in many colours and flavours. Here I chose to bake vanilla, pistachio and coconut flavoured biscuits (recipe below):

IMG_0022

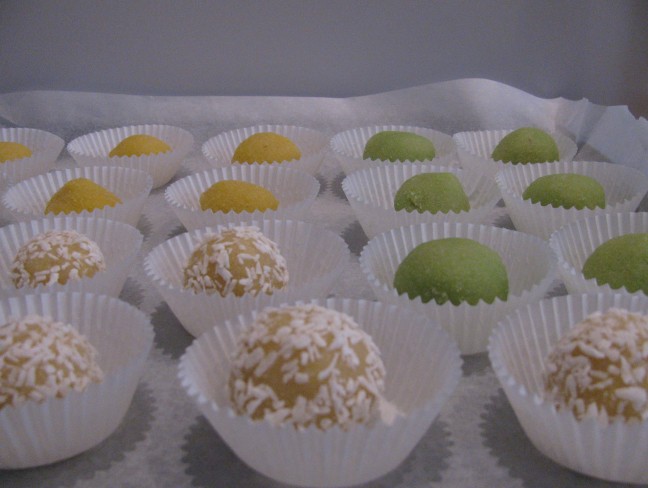
All lined up, before placing them in the oven:

Sicilian pasta reale biscuits

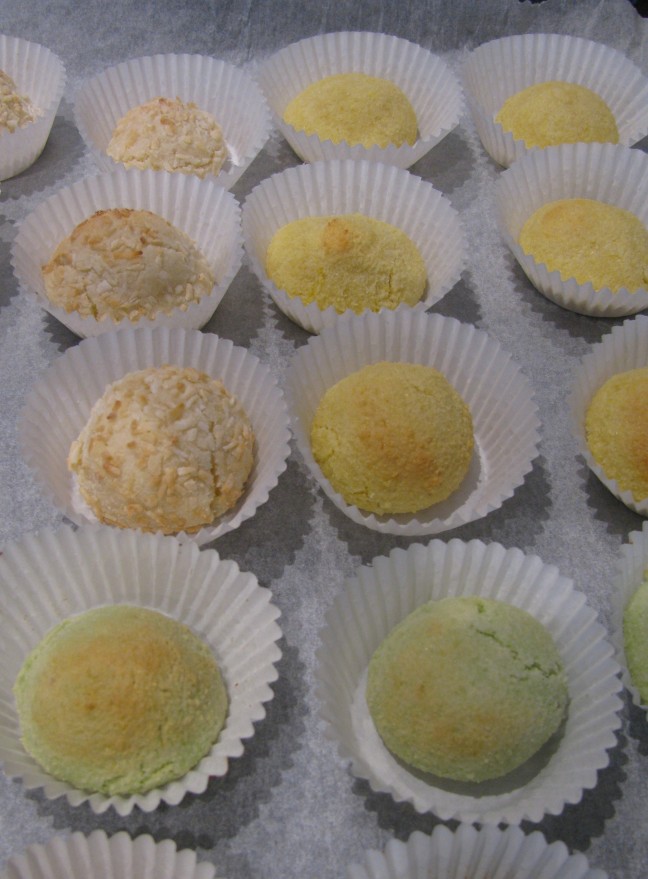
After an 8 – 12 minute baking time: 

Sicilian pasta reale biscuits

Sicilian pasta reale biscuits

Recipe:

Ingredients (for 3 people)

  • 325 g caster sugar
  • 280 g ground almonds
  • zest of 1 1/2 lemons
  • 3 egg whites

Method

In a bowl, combine the sugar ground almonds.

IMG_0001

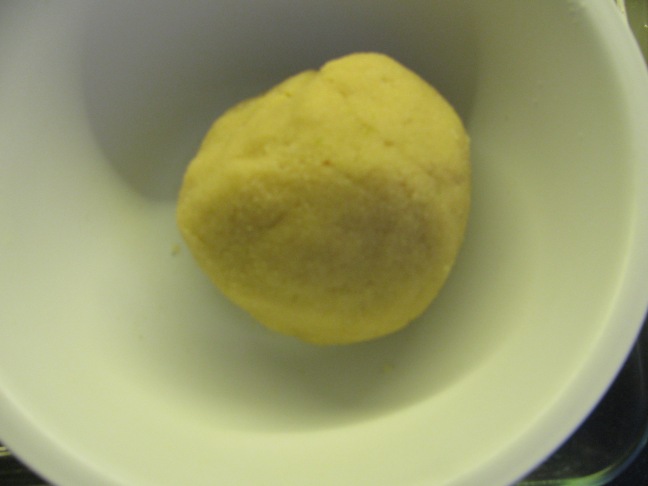
Add lemon zest, egg whites and mix by hand until you obtain a smooth paste that has the consistency of marzipan.

IMG_0002

Cover and put aside for one hour. 

Preheat the oven to 165°C.

Knead the paste working very quickly, as it warms up rapidly and then turns sticky.
Separate the paste into as many parts as flavours that you have chosen to give them. Add the desired flavour and, if you like, some food colouring.

For vanilla biscuits: Add transparent vanilla flavouring and (if desired) yellow food colouring.

For pistachio biscuits: Add pistachio flavouring and green food colour.

For coconut biscuits: Add a little desiccated coconut into the paste, roll it into small spheres and then dust these with some more desiccated coconut.

When all shapes are ready, bake the biscuits at 165°C for between 8 to 15 minutes, depending on your oven.

Italian Lemon Polenta Cake Recipe

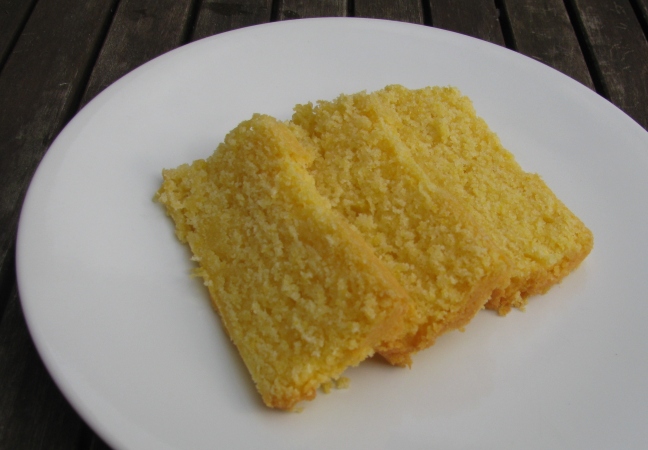
The recipe for this fluffy, incredibly yellow cake is part of my go-to recipes and I hope you try it out.  

Lemon Polenta Cake

The vibrant colour comes from the polenta and eggs and the cake is ideal for summer as it’s fresh and light.
If you prefer, you can use oranges instead of lemons.

Ingredients

• 125g unsalted butter
• 125g caster sugar
• 2 large eggs
• 70g polenta bramata
• 100g plain flour
• 1tsp baking powder
• the zest and juice of two lemons (or two oranges)

Method

Heat the oven to 160C.
Grease a loaf shaped baking tin with butter, then coat it with plain flour.
Mix the butter and sugar with an electric whisk, then add the eggs one at a time and amalgamate well.
Now add all the remaining ingredients.

Lemon Polenta Cake
Pour the mixture into the baking tray and cook for ca 45 minutes, or until a wooden skewer comes out clean.

Buon appetito!

Lemon Polenta Cake


How to make Elderflower Cordial

Elderflower blossom

A delicious and easy Elderflower Cordial recipe

Ingredients:

  • 30 fresh Elderflower heads with trimmed stalks (it’s best to pick blossoms that don’t grow near a motorway)
  • 2 unwaxed lemons, zest grated and fruit cut into rounds
  • 1.5 kg granulated sugar
  • 85g citric acid
  • 1.5 litres of water
  • sterilized glass bottles with a firm lid

Method:

Place the sugar into a large sauce pan, add the water and heat up until the sugar dissolves, without bringing it to the boil.
Once the sugar has dissolved, bring the liquid to the boil, then switch off the heat.
Add the grated lemon zest, elderflower blossoms, lemon rounds and citric acid.
Cover with a clean cloth and leave to infuse for 48 hours.

Place a fresh, finely woven tea towel over a colander and pour the syrup through it into a pan.
With a funnel, fill the sterilized bottles, seal and store in a cool dry place.
The cordial is great with both still or sparkling water. Once opened, store it in the fridge.


Planting your own Kitchen Window Herb Garden

This was something I intended to do last year, but never took the time to put into practice. So in March this year I finally went for it. 

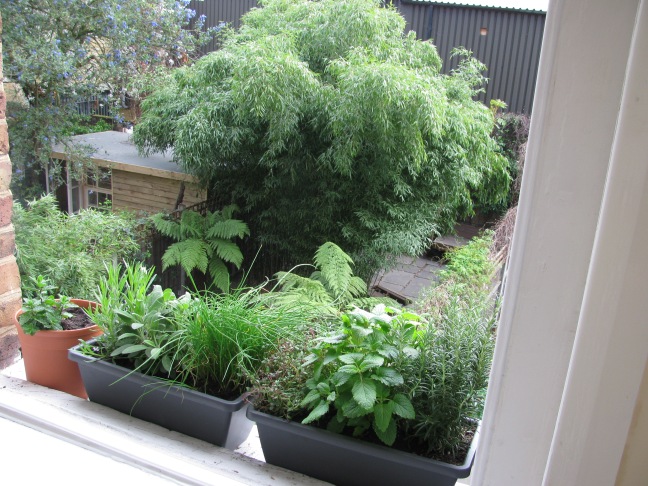
Eight herb plants were the most I could fit into two planters and a pot. I ventured to Columbia Road Flower Market  and as usual was not disappointed. The quality of plants they sell is second to none and the price is neither. 
My strategy on Columbia Road Flower Market is to walk the entire length of the market and assess every stall without buying anything, then turn back and pick the healthiest plants from the stalls that made it into my short list. I always end up buying one or two plants from two to three different sellers. Every stall is specialised in a specific area, so the stalls I buy from change depending on what I’m looking for.

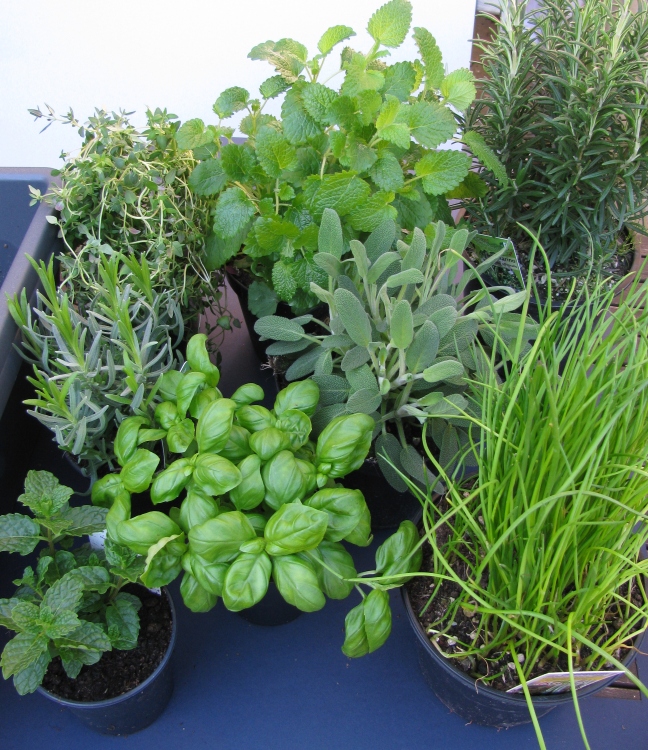
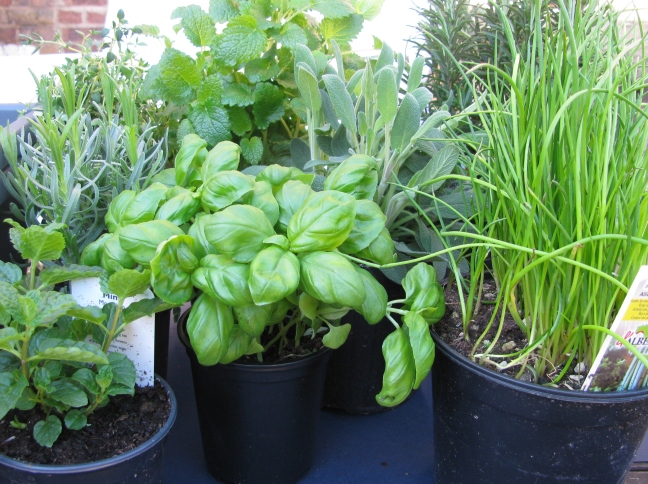
For the Kitchen Window Herb Garden I bought one of each (clockwise from the top left):
Thyme, Lemon Balm, Rosemary, Chives, Sage, Basil, Mint and Lavender

Herbs

Herbs

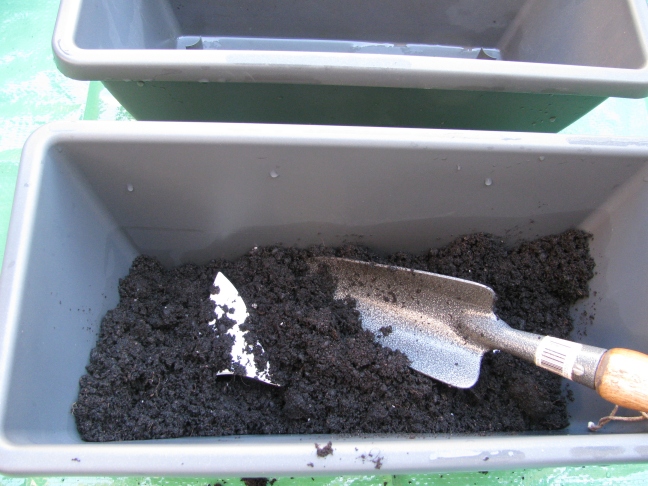
 Before filling the planters with soil, I covered the drainage wholes with potsherds.
One could also use small stones.

IMG_8544

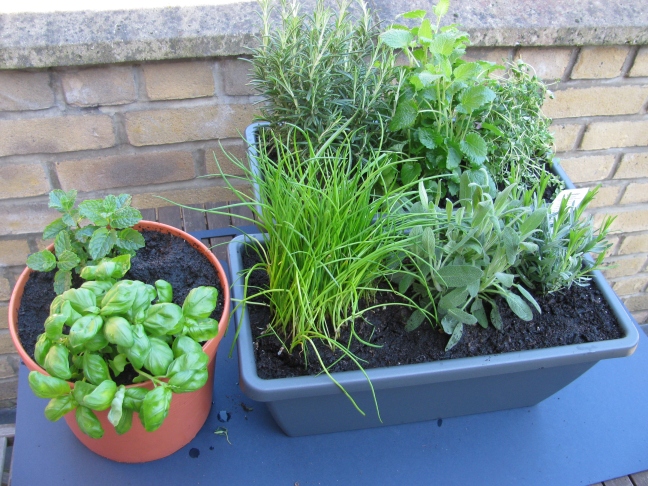
 Then added fresh soil and the plants.

Herbs

When deciding which plants to put together in one pot, I placed the Basil next to the Mint plant. I believe this was a mistake, as the basil did not last for two days. I’m certain it was not due to the quality of the plant, but rather due to the location, too much or not enough water or the fact of having been placed next to the mint plant. To be honest I don’t know. However all other plants are doing well and are now on the window sill. 

Herbs in Pots

Herbs on windowsill


Herb Garden on Window Sill

Happy Gardening!

Beetroot chocolate brownie recipe

One could argue that this year’s Christmas desert recipe is slightly similar to the one from last year. Hence, for those of you who are keen to try something equally nice but very different, I’ve added this beetroot chocolate recipe from the BBC Good Food website which I tried some weeks ago. 

Foto credit: Plantmenow.co.uk

Ingredients
250 g whole beetroot (you can buy it pre-cooked and vacuum packed in the vegetable section of many supermarkets)
50 g unsalted butter
70 g plain chocolate (70% cocoa)
1 tsp vanilla extract
125 g caster sugar
1 egg
50 g plain flour
10 g cocoa powder

Method
Boil the beetroot in the vacuum sealed bag as per package instructions until tender.
Butter a small roasting tin and heat the oven to 180°C / Gas mark 4.
Cut the chocolate and butter into rough cubes.
Drain the beetroot into a sieve and place into a food processor with the butter, chocolate and vanilla. The latter will melt when in contact with the hot beetroot. Blend until the mix is smooth.

In a separate bowl, whisk the eggs and sugar into a thick and pale foam for about 2 minutes. Spoon the beetroot mix into the bowl and fold it under the whisked egg mix using a metal spoon.
Sift in the flour and cocoa powder and gently fold under.
Now pour the mixture into the baking tin and bake for 25 minutes or until a skewer comes out clean.
Cool completely, then cut into squares.

Bon Appétit!

Beetroot chocolate brownies

Lemon self-saucing pudding desert recipe

Merry Christmas and Happy New Year! 

It is a tradition for me to share a desert recipe during the Christmas holidays.
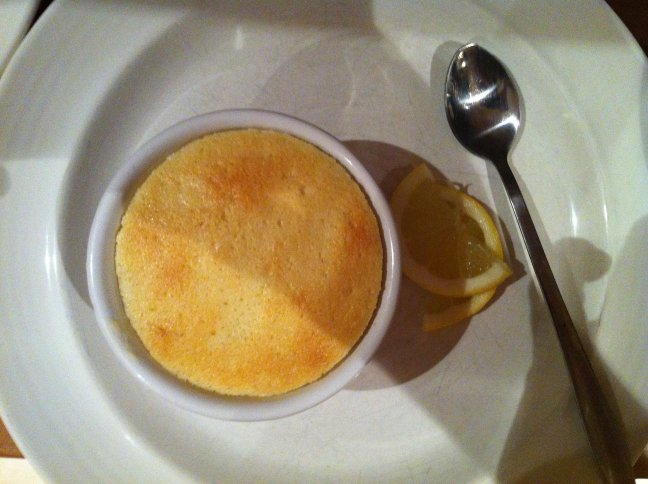
This year, it is a Lemon self-saucing pudding by Michel Roux.
You are still in time to try it for New Year’s eve! It is very simple to make and delicious.
The top is light and spongy, underneath there is a liquid lemony sauce. 

Lemon self-saucing pudding

Ingredients (serves 6)
45 g butter, plus some to grease
210 g caster sugar
finely grated zest of 1 lemon
juice of 1 1/2 lemons
2 eggs separated
3 tbs self-raising flour
300 ml milk

Preparation
Preheat the oven to 160°C /Gas mark 3.
Butter 6 round ovenproof ramekins.
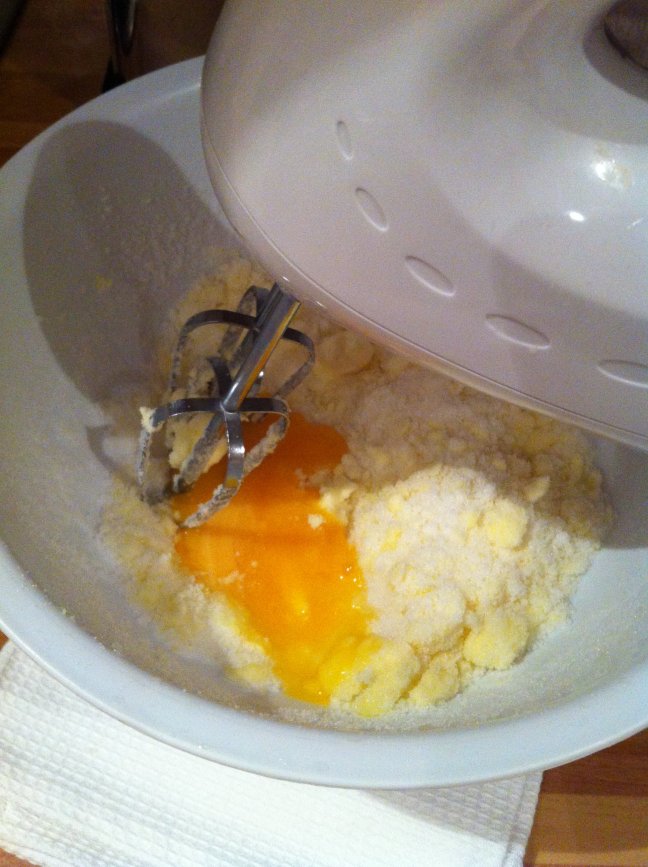
In a bowl mix the butter, 190 g of the sugar and the lemon chest with a hand mixer for one minute.
Add the egg yolks and beat until the mixture is smooth.

beating butter, sugar and eggs

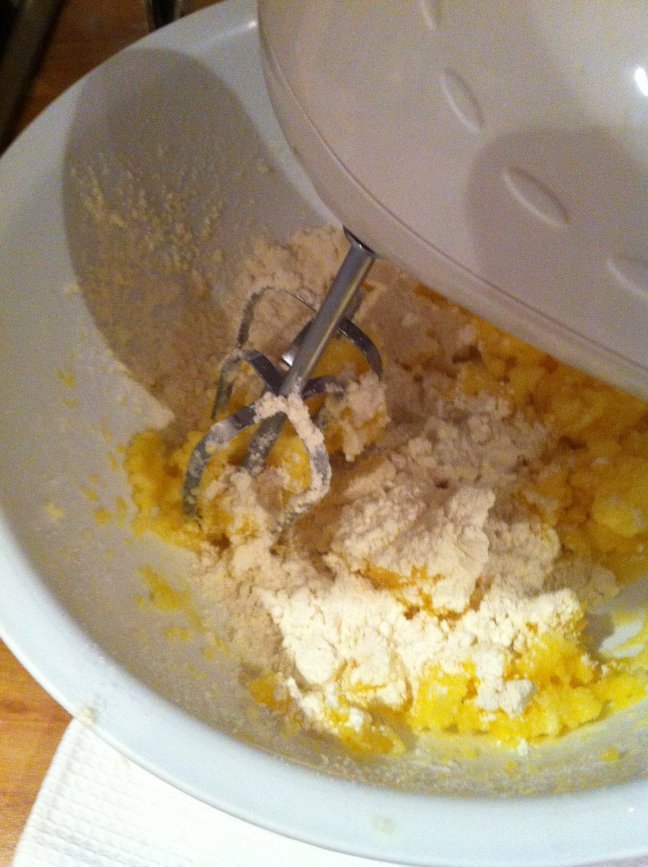
Slowly add the flour and milk until the mixture is homogeneous, then add the lemon juice. At this point the mixture will become very liquid.

Beating butter, sugar, eggs, lemon zest, self-raising flour

In a separate bowl, whisk the egg whites, then add the remaining sugar.
Using a spatula fold the egg whites into the pudding mixture without losing the fluffiness.

Lemon self-saucing puddings
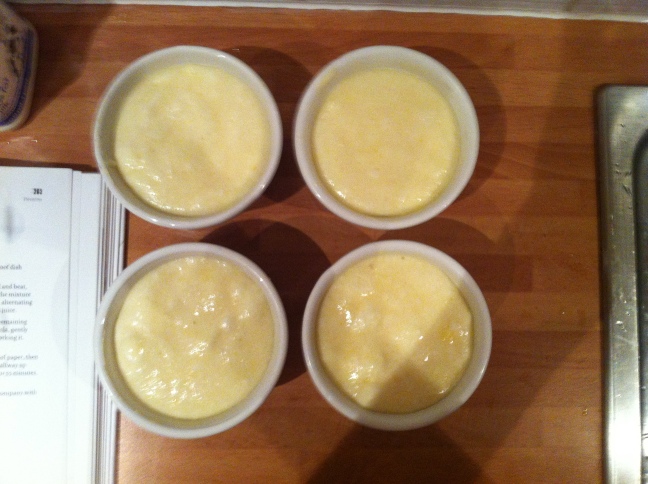
Pour the mixture into the ramekins and place them into an ovenproof Pyrex glass dish or roasting tray, pour hot water into the tray to cover the dishes half way up. Transfer this into the oven and cook for 55 minutes until the puddings have risen and have golden tops.
Before serving, leave the puddings to stand for 10 minutes. This ensures the liquid at the bottom sets to a perfect consistency.
Accompany with pouring cream (optional) and lemon slices as decoration.

Lemon self-saucing pudding


Italian filled artichoke recipe from the Lake Garda region

This family recipe has been passed through generations until it reached me. It comes from the Lake Garda region and I hope you try it out.
Ingredients (per person)
•  1 large globe artichoke
•  50g /1¾oz breadcrumbs
•  20g/ ¾oz finely grated Parmesan
•  finely chopped parsley
•  a pinch of salt (not too much as the Parmesan is already salty)
•  freshly ground black pepper
•  2 pressed garlic cloves
•  extra virgin olive oil

Method
Wash the artichoke, cut off the stem and slice off the top third of the artichoke with a knife.

In a bowl, mix together the breadcrumbs, parmesan, chopped parsley, salt, pepper and pressed garlic cloves.
Then slowly add the olive oil trickling it into the bowl, until you have a lightly brown, unctuous mixture.

With a teaspoon, fill the mixture into the space at the base of each leaf, starting from the outside working towards the centre. Artichokes can be a bit sturdy, so you might need to apply some force at the beginning to create space between the leaves to spoon in the mixture.

Now that the artichoke is filled, prepare a pan with ca. 5cm (2 inches) of water, add a pinch of salt and place the artichoke into the pan. Also add the stem, which can be eaten too. The water should just come up to half the height of the artichoke.
Bring the water to the boil, then lower the heat, cover with a lid and simmer for ca. 30 – 40 minutes. The artichoke is ready when you can pull a leaf from the outside without resistance.

If you like, you can then put the artichoke into the oven for 3 to 4 minutes, to achieve browned tops and dry the mixture if necessary, but it can also be eaten right after the 30-40 minutes of cooking on the hob.

To eat the artichoke, start from the outside, remove each leaf with your fingers and eat them using your hands. You can eat the bottom two-thirds of the leaf and the filling. The further inside the artichoke, the more of each leaf is edible, as the inner leaves are softer than the ones on the outside.

Then you will reach the artichoke heart (or ‘fond’), which as you can see in the picture below, contains the ‘choke’ which resembles hay (and should not be eaten).

Remove the artichoke hay with a spoon and eat the whole artichoke heart that remains. The fond can be eaten plain, or dressed with a little olive oil.

P.s. while eating, your hands will be covered in food, so best to have a bowl of water ready on the table with disposable napkins. Happy cooking!

Carob plant

Hello,
It’s been a while since I posted on the blog so I thought I’ll give you an update of what I’ve been up to gardening-wise.
I discovered Carob!
Carob, also called St John’s bread or Ceratonia siliqua, is an evergreen plant that is native in the Mediterranean region. It grows in both shrub and tree form and bears edible fruit.

• The interesting thing about carob is that its legume-like fruit can be eaten both fresh as well as dried and are used as a substitute for chocolate. Carob has been cultivated for around 4,000 years and was used already in ancient Egypt.
In the hieroglyphs the carob pod is used next to an owl and another symbol to signify the word ‘sweet’.

                              the hieroglyphic symbol nedjem, for ‘sweet’

• Until after the Second World War carob was also commonly eaten in Europe to supplement rationed food.
• What makes carob also interesting is that, because each seed has exactly the same size and weight, carob seeds were used for weighting gold in the Middle East and by the ancient Romans. The Roman solidus (a pure gold coin) in fact weighted 24 carat (24 carob) seeds, and this is why carat became a measure for the purity of gold, with 24 carat meaning pure gold, and 12 carat meaning an object contains 50 percent gold.

•  As you can see, I broke the carob pod up to get the seeds out.
• Before planting the seeds, I soaked them over night in water, as I read that that’s the best way to plant carob. So far there is no growth, but I hope that the seeds will germinate soon.

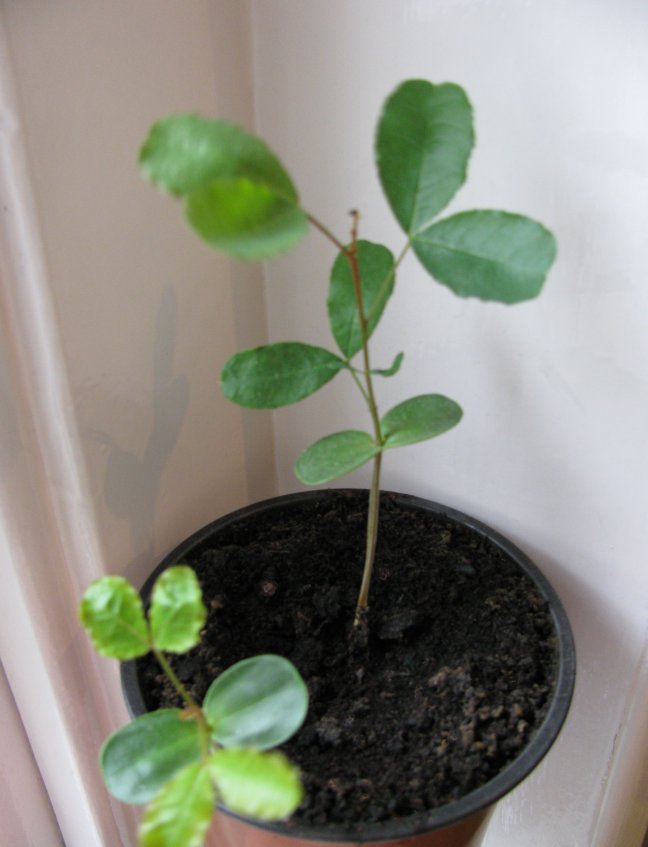
Update from March 2013, one carob seedling has germinated and is now slowly growing:

carob seedling

• Besides using the seeds to grow a plant, you can eat the pod (not the seeds) and online I found several recipes for making cakes and brownies. I haven’t tried any recipes so far, which means that unfortunately I’m not able to recommend any recipe in particular – yet : )

What about you? Have you already tried baking with carob? Can you share some good recipes with us?

Edible flower review

Hi everyone!
I recently found out that my friend Adam sells edible flowers on his market stall. So, of course, I was intrigued by the idea and wanted to taste and possibly review these flowers myself.
I bought two boxes of flowers from him and started my tasting session. And I must say, I was swept away!  These edible flowers were truly amazing!
[this is the dinner I prepared: roast chicken with a flower and tomato salad]

To be honest, I was expecting to eat something which would taste blandly green, but how wrong was I! I ended up trying each flower individually [see photos and taste description further below] and was so impressed by the variety of flavours these plants have.
The flowers come in a transparent plastic box. For this review I tried the ‘Chick bag’ and the ‘Bull bag’.

[The Bull bag]

Before trying the flowers, I drafted a few review questions – and here are my answers:
Smell the flowers don’t have a strong fragrance. Some of them don’t have a scent at all.
Taste Each box contains a variety of different flowers and impressively each flower has three to four different flavours. The flavour changes from when you start eating, to a different flavour while you chew, to yet another flavour that is left as an aftertaste.
Overall impression Great. I can’t believe I waited so long to try this. It was a wonderful experience.
Price £4.50 per box. I think it’s a fair price, given that the box provides enough for two people, if you use the flowers for a side dish. If you only use a few flowers as decoration for a desert or a cake, the box contains enough for several decoration projects. So all in all a very good price. Of course, I wouldn’t eat this all the time, and consider it more as something to eat for a special occasion.
What do you think is the best way to use them I would eat them with meat. The Cornish Food Club has matched the flowers so well to the different types of meat, that I think eating them with a well cooked, good cut of meat is how you get the most out of these flower boxes. As you can see further below, I used the blossoms also in a fruit salad, but it did not taste that nice and I felt the flowers were almost wasted, as their flavour could not develop, as it did with the chicken.
I have taken a picture of each flower contained in the two boxes with a description of the taste for almost all of them:
The Chick bag:

I did not know what these flowers were, but thought they tasted a bit bitter like rocket salad. Later I found out that they are indeed rocket flowers.

Cornshoots these were interesting and I wanted to eat more of them. They have a light, zingy, fresh flavour with a sweet aftertaste.

Rocket leaf this has a more mossy, ‘grown-up’ aroma. It tastes a bit like whisky, compared to beer.

Tagetes leaf  is lemony combined with a flavour I had never tried before. It is difficult to describe, but a truly inspiring combination of flavours.

Fine peashoots I don’t know how to describe this. Again, it tastes different from the others and I liked it.
Purple viola [sorry no close-up picture] tastes of violet, which you might remember from bonbons, but less sweet.  However, there  is not only the taste of the viola – while you eat, you can also smell the flower in your month: the scent moves from inside your mouth internally through your sinuses into your nose. A strange, but wonderful sensation.

Yellow viola is similar to the purple viola, but has a less strong, more suttle aroma.

Pink daisy [no close-up photo] it is beautiful to look at, but has a neutral taste.

Overall, when you eat the whole salad, it matches perfectly with the chicken and the salad has a real gourmet feel to it.

The Bull bag:
Unfortunately I didn’t write down what I thought of each single one of the plants in the bull bag, but I have taken pictures of all of them.

Red amaranth 

Dittander  

Radish flower 

Red mustard  

Fennel fronds

Marigold flowers these don’t have a strong flavour. They are more pretty than tasty.

Overall, when you eat the whole bull bag salad, it has a more ‘robust’ flavour than the chick bag and a cumin-like taste comes through as well.

[The Chick bag]

My verdict: Eating the edible flowers has been an all-round good experience for me. I can only recommend it!

If you would like to buy the edible flowers that feature in this post, the Cornish Food Club market stall is open every Saturday on Maltby Street Market, in Bermondsey, London.
They sell five mixed boxes, each picked to match the flavour profiles of different meat. I have asked them what exactly you can find in each flower box:

  • ‘Chick bag’– fine peashoots, cornshoots, rocket flower, viola, rocket leaf, and tagetes leaf.
  • ‘Bambi bag’ – nasturtium flower, tagetes flower, blackcurrant sage flower, parsley and carrot tops.
  • ‘Bull bag’ – fennel fronds, radish flower, marigold, dittander, red mustard, cornshoots, red amaranth and carrot tops.
  • ‘Ham bag’ – borage flower, bubbles cress, radish pods, red lion mustard and red amaranth.
  • ‘Baa bag’ – blackcurrant sage, nasturtium, watercress, celery, and pink stemmed ice plant.

A package of flowers costs £4.50 and stays fresh for ca. a week in the fridge. The flowers come from Cornwall from The Modern Salad Grower in Looe and also go to some of the country’s top restaurants, including Heston Blumenthal’s The Fat Duck in Bray. So that’s an option to consider if you don’t want to cook the flowers yourself, but fancy a professionally cooked flower-meal.